Matte Drawing Pencils – No More Graphite Shine
The Problem with Graphite Pencils
I love using my graphite drawing pencils to create drawings and I bet you do too, but there are two major problems when it comes to graphite drawings.
The first is graphite is actually a dark gray and not black. No matter how hard we push it, we’ll never be able to create true black with a graphite pencil.
Have you ever created a graphite drawing and noticed it was super shiny when you were finished and it was incredibly frustrating when you looked at the drawing from a certain angle and all you saw was the reflection of the light? Well, this is something called graphite shine.
The second obvious issue with graphite is that graphite drawings sometimes have this shine associated with them. Graphite is inherently a shiny medium, so graphite drawings are a bit shiny. Thankfully, there are a couple of products on the market that will help to eliminate that graphite shine and also make our blacks a little bit blacker.
Matte Drawing Pencils That Reduce Shine
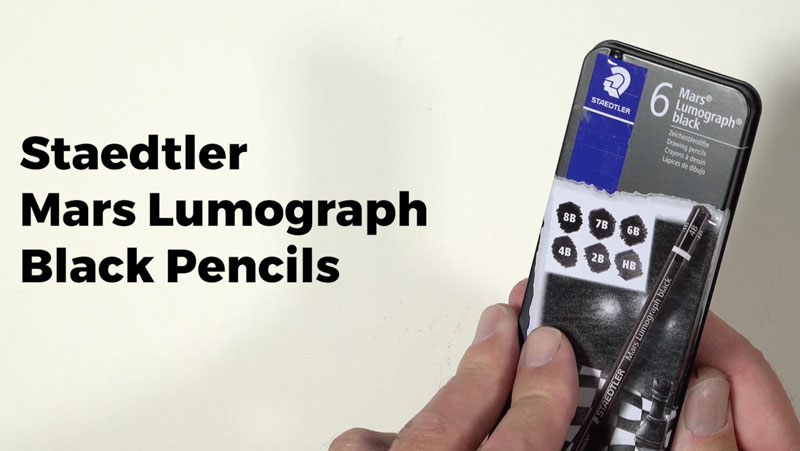
The pencils we’ll discuss and use here are Mars Lumograph black pencils by Staedtler. Staedtler, of course, is one of the most reputable brands out there for drawing products. I love their products and I’ve used them on many occasion. In fact, I love Staedtler products. I found these pencils and started using them during our last season of Getting Sketchy (Season 7).
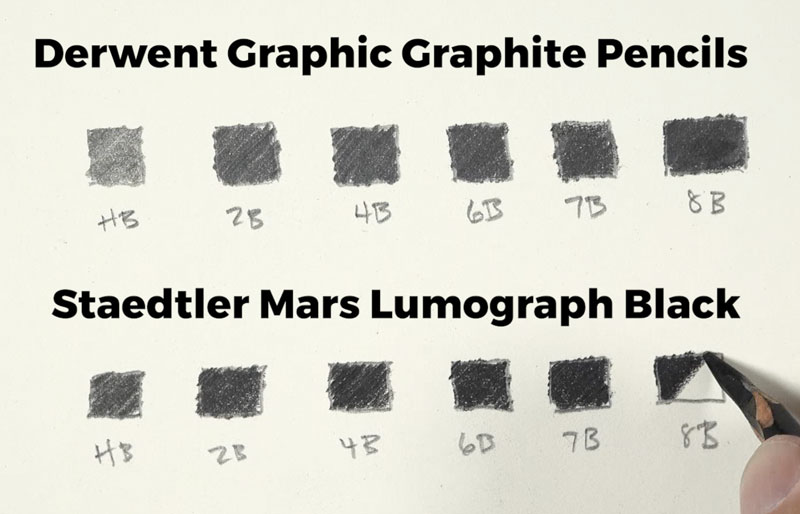
First we’ll do a little bit of a comparison between these pencils and traditional graphite pencils. I’m going to be comparing them to my favorite wooden graphite pencils by Derwent. Here’s a look at my Staedtler black pencils. Inside of my case, I’ve got six pencils. There is an HB pencil, 2B, a 4B pencil, a 6B pencil, a 7B pencil and an 8B pencil. As you can tell, these are mostly the darker values.
Making Marks with Matte Pencils
You’ll notice below that the black pencils are noticeably blacker, as they should be. You’ll also notice that they are less shiny as well. If we take the paper and bend it, we can still see there’s a little bit of shine – especially with the lighter pencils. But the darker pencils shine considerably less. This is due to a higher concentration of carbon content in the black pencils. They’re actually not called graphite pencils at all. The carbon content is making these pencils a lot darker and a lot blacker but also reducing the shine.
Blending and Erasing Matte Pencils
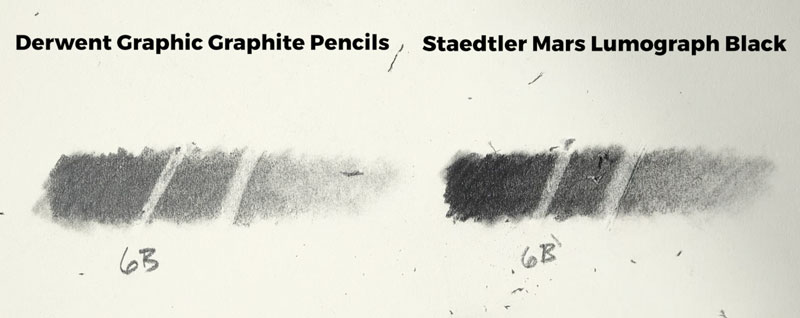
Both pencils are easily blended using a blending stump. The graphite pencils are only slightly easier to blend.
Let’s take a look at how these two different types of pencils erase using a kneaded eraser. You can see that the graphite is a bit easier to lift than the black pencils, but the black pencil is still erasable just to a lesser degree, especially with the kneaded eraser.
Matte Pencil Feel
These pencils are nice and smooth as they make marks but they feel a little bit different than graphite. They feel closer to using a colored pencil. I do feel like this is due to the carbon content. If you’ve ever used a colored pencil on drawing paper, you know how that definitely feels a little bit more waxy. These pencils have that type of feel when you’re moving them across the drawing paper.
Creating a Drawing with Matte Black Pencils
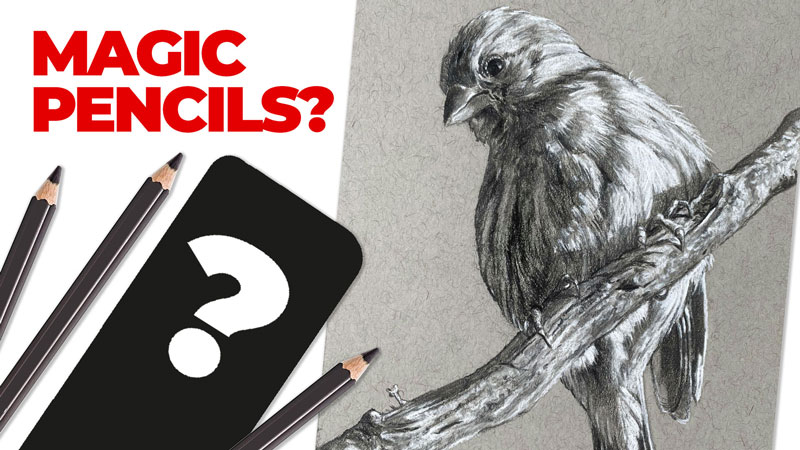
Now that we’ve had a quick look at how these pencils behave and how they compare with traditional graphite pencils, let’s go ahead and create a drawing from start to finish using these pencils along with some white charcoal on gray drawing paper.
For this drawing, I worked on Strathmore gray toned drawing paper. Graphite and white charcoal is a combination of drawing media that I really enjoy. This combo allows me to push the value range outward from a neutral gray. Essentially I can start with a neutral value – the gray, and add both darks and lights to build out a full range of value. Of course, one of my complaints with using traditional graphite pencils is the graphite shine and the fact that traditional graphite pencils will never get totally black.
Creating the Sketch of the Bird
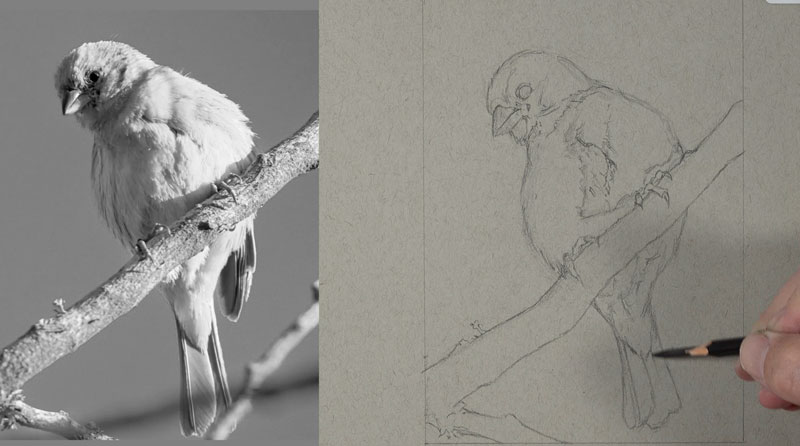
I start the sketch like I would any other ordinary sketch – basically focusing on the shapes that I see that make up the bird. These include shapes of both dark and light value but also the shapes of the different parts of the bird – the eye, the beak, the branch, the talons, and so on. I use only the black pencil, so there’s no graphite pencil used at all in the development of this drawing – just the black matte pencils.
Shading and Developing the Values
Once I’ve got some of the basic contours in place, I’m ready to start applying the material with more vigor. We’ll next begin developing the value. I start at the top of the picture plane and work my way down. I take each section of the subject one at a time while being careful to keep the palm of my hand of out of the way.
I’m concentrating on both adding the light values on the right side and the dark values on the left side. As the matte pencils are layered, they are gently blended. White charcoal is carefully placed as well, gradually building up contrast in value. As the contrast develops, the form of the bird starts to make sense in the drawing.
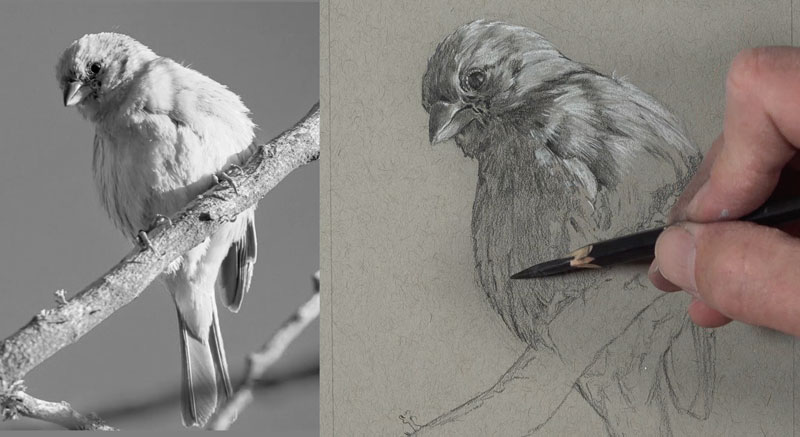
A blending stump or a blending tool works great with this medium. It blends predictably, and you can still erase and lift up the medium.
Just like I would with any drawing, I’m considering the texture. The key to creating the illusion of texture in a drawing lies in your relationships of values and the directional strokes that you make. As we work down to the branch, the process remains the same. We can gradually build up the range of value through careful applications of the matte drawing pencils and white charcoal.
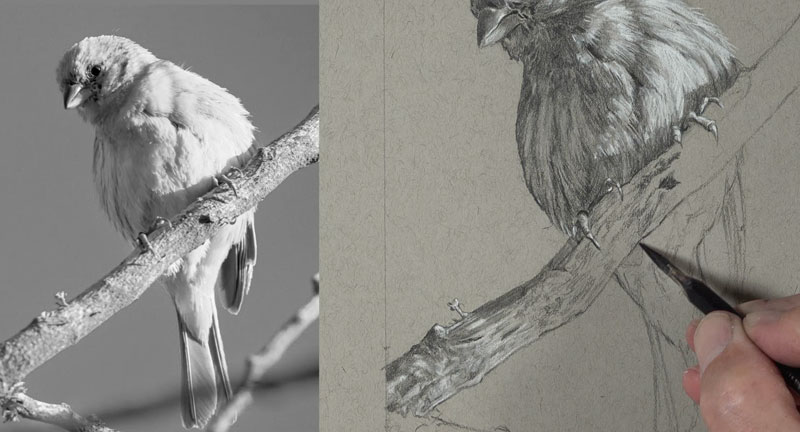
While I want this drawing to be representational, I’m not tied too much to the reference. I’m picking up information from the reference regarding the texture – the patterns that I see – that can translate into the texture of the branch. Then I’m just translating those patterns that I see into the drawing. Every little single mark that I see in the photo reference is not necessarily included in the drawing, but rather the suggestions that I’m getting from the photo reference.
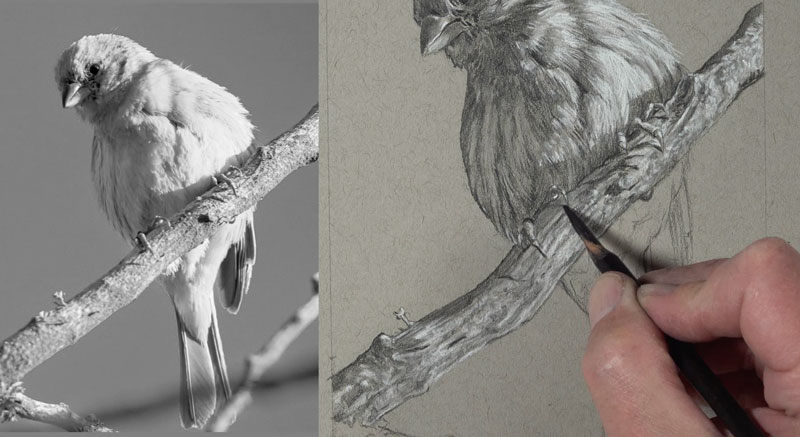
One of the things that I’ve noticed about these pencils is that they do seem to accentuate the tooth or texture of the paper slightly more than traditional graphite pencils. Of course, this can be alleviated by using a blending stump. Depending on the desired look of your drawing, this could be a positive or a negative.
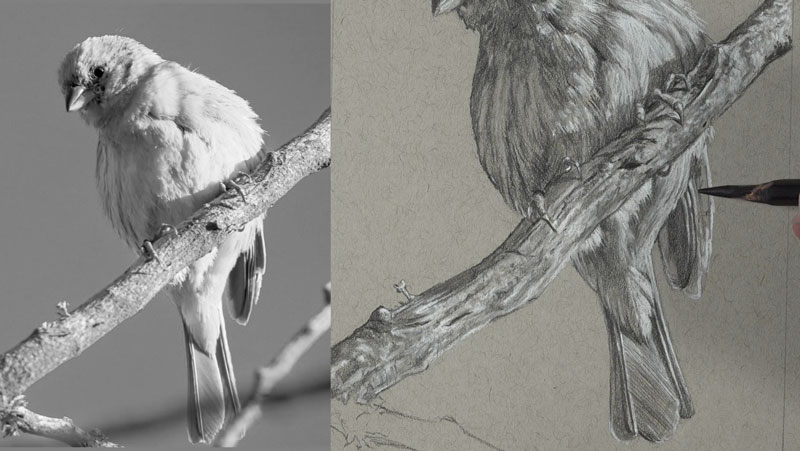
As we continue to work down to the lower part of the drawing, you’ll note that the matte drawing pencils do mix with the white charcoal to a certain degree. When they do mix, a cooler gray develops. We can see how cool this gray is when we compare it to the warm gray tone of the drawing paper.
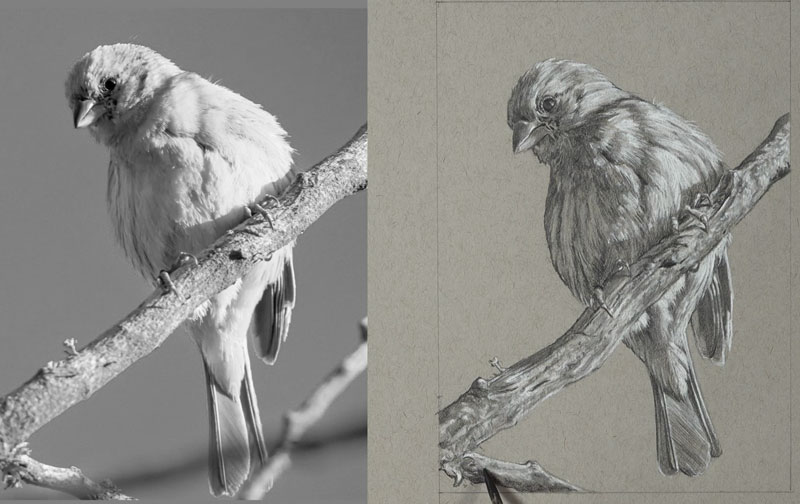
Matte Drawing Pencils – No More Graphite Shine – Conclusion
Now our drawing of a bird with black matte drawing pencils and white charcoal is complete. Here’s a look at the completed drawing…
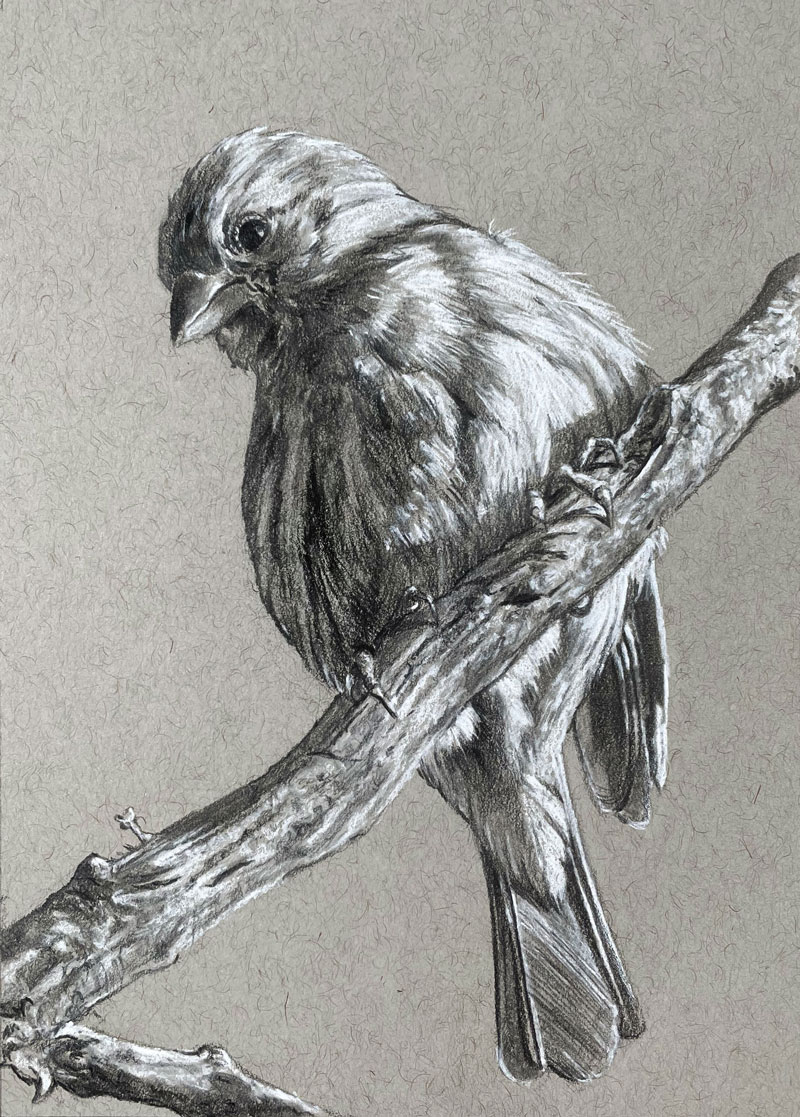
Although these matte pencils don’t totally eliminate graphite shine, they do reduce it greatly. If you can get past the waxy feel of the pencil, then these pencils may belong in your drawing box – for those times you need serious blacks without the shine.
